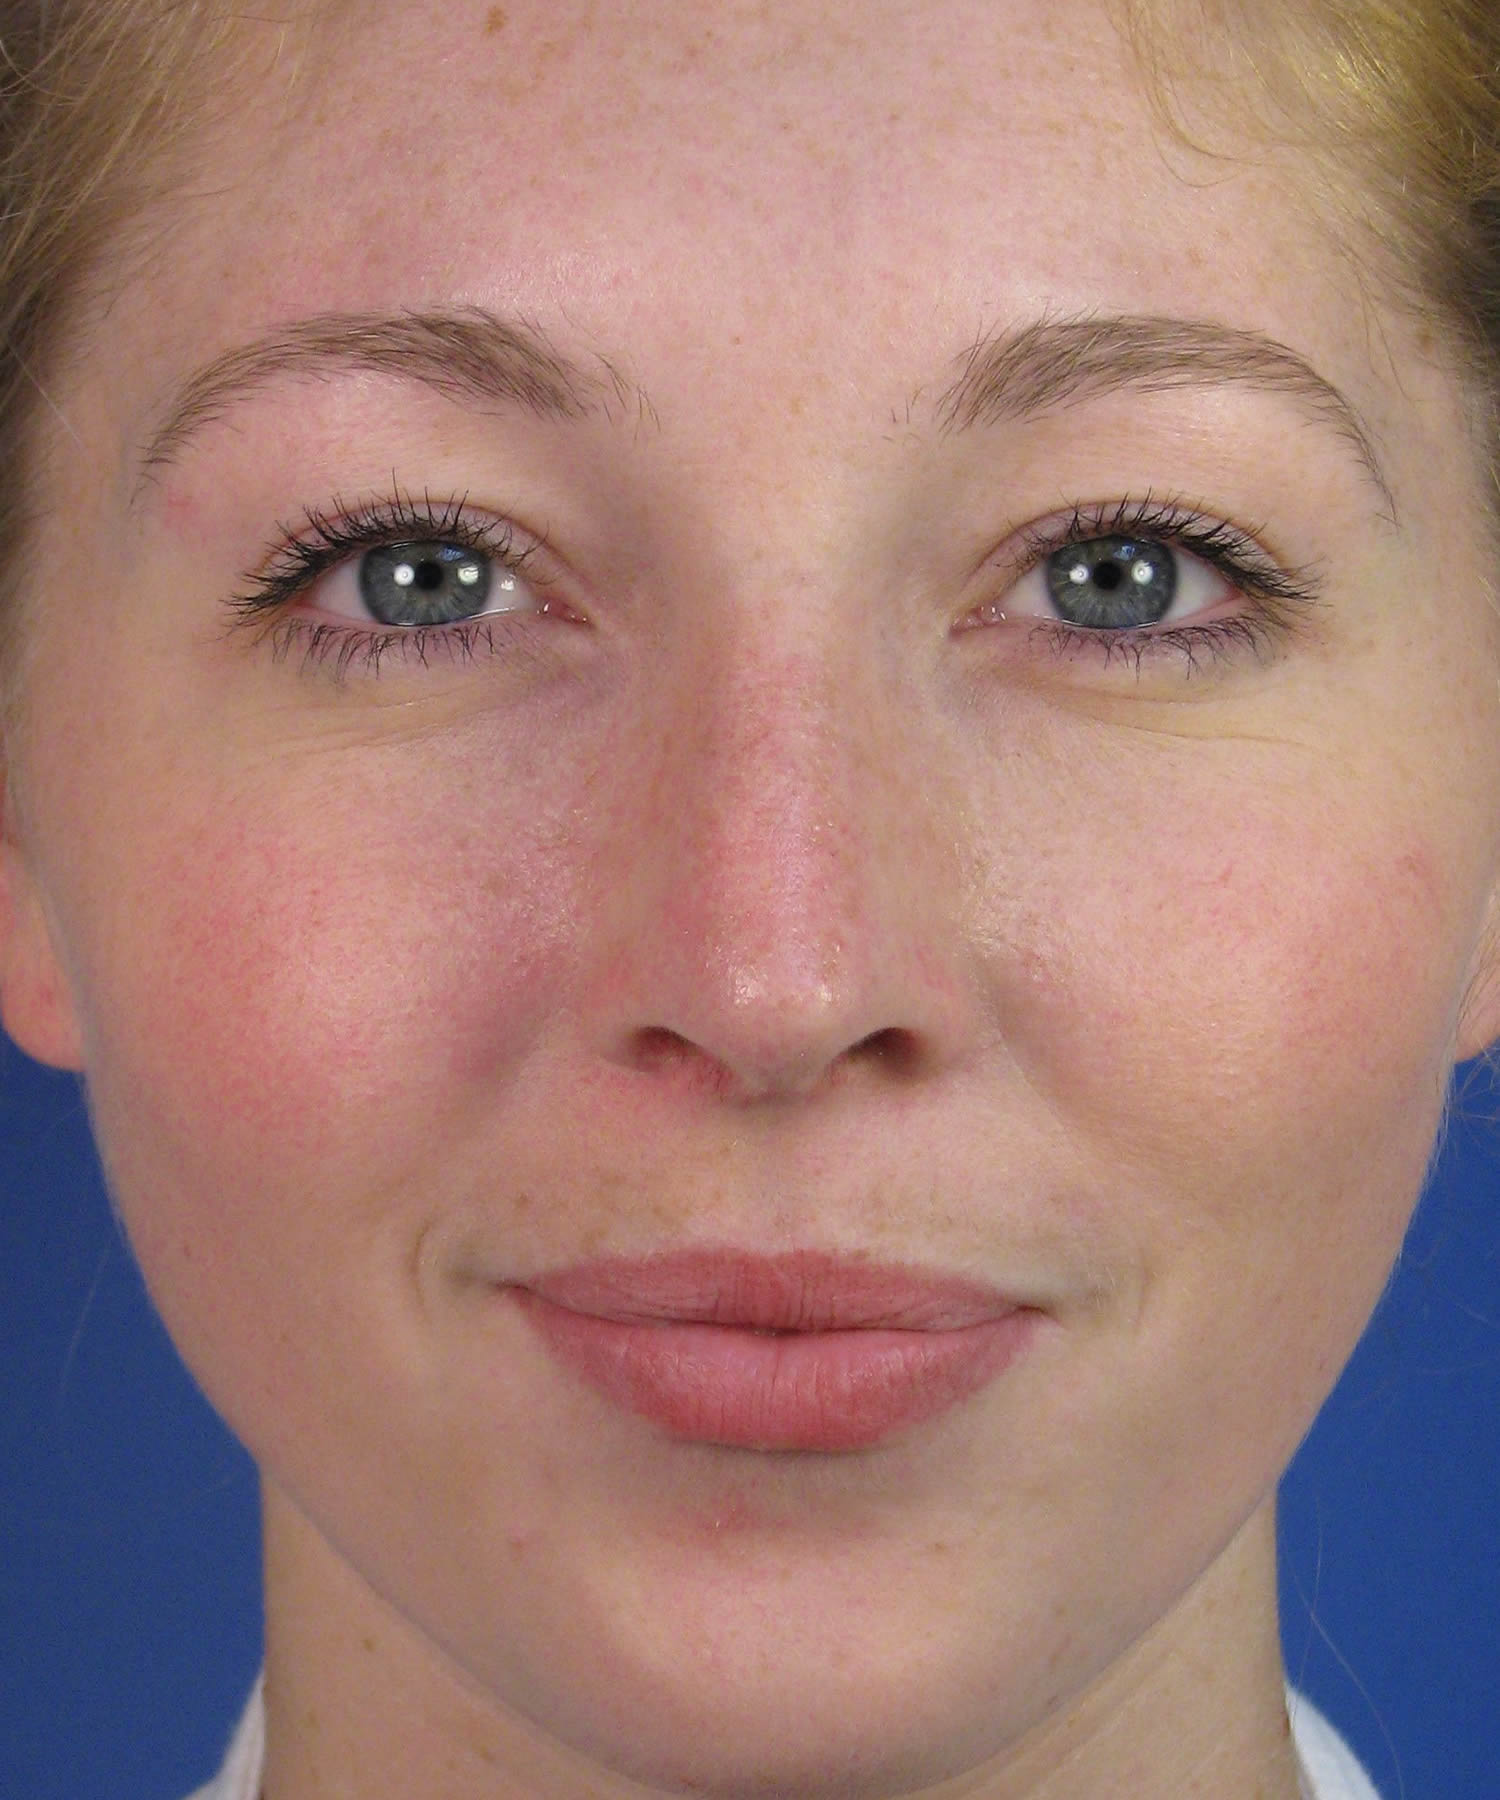
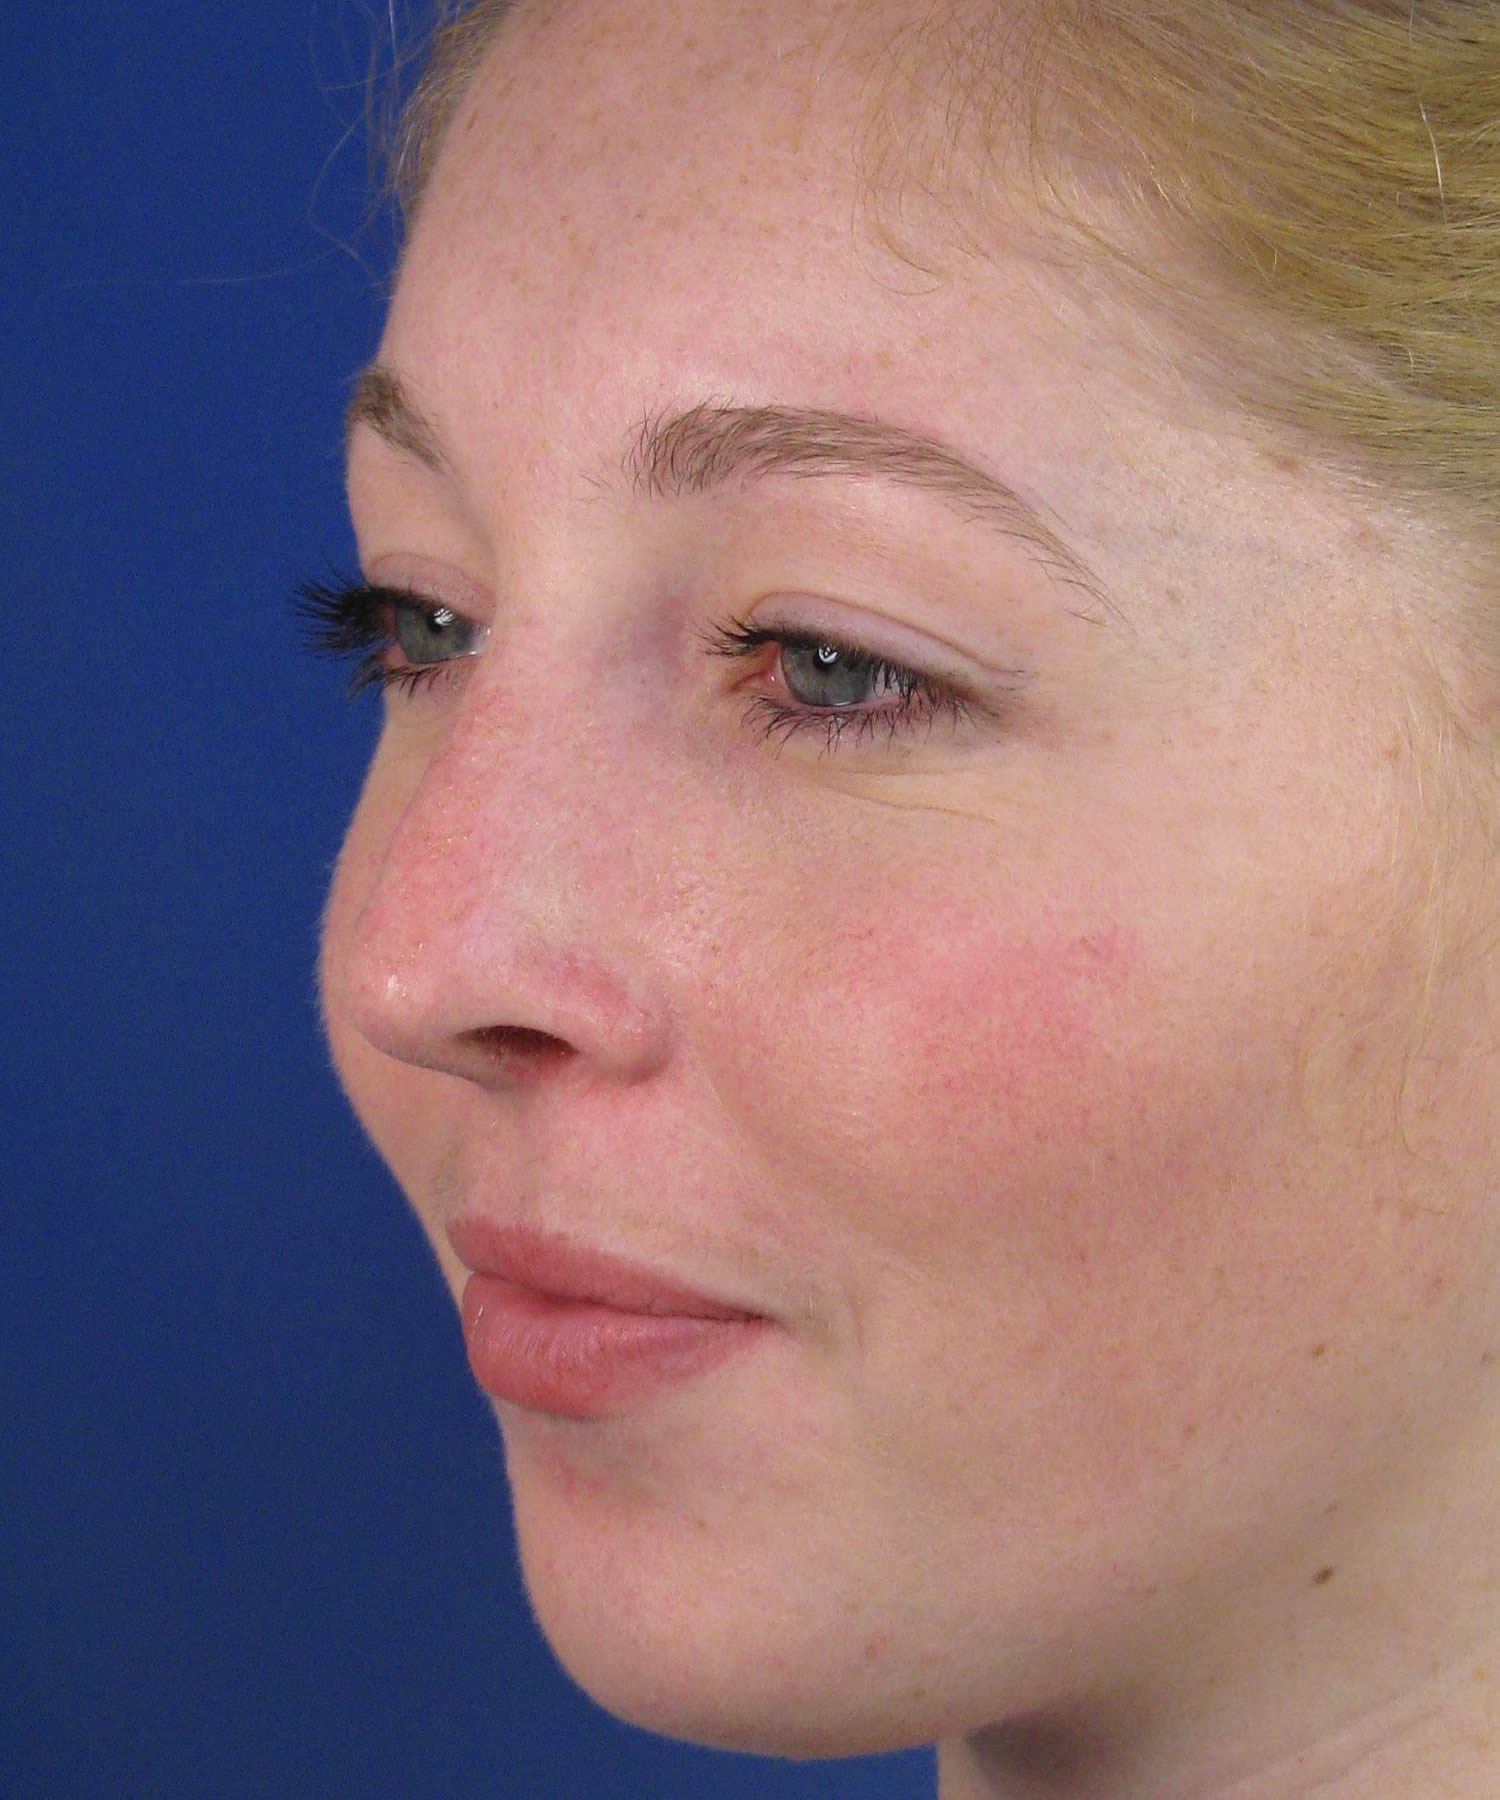
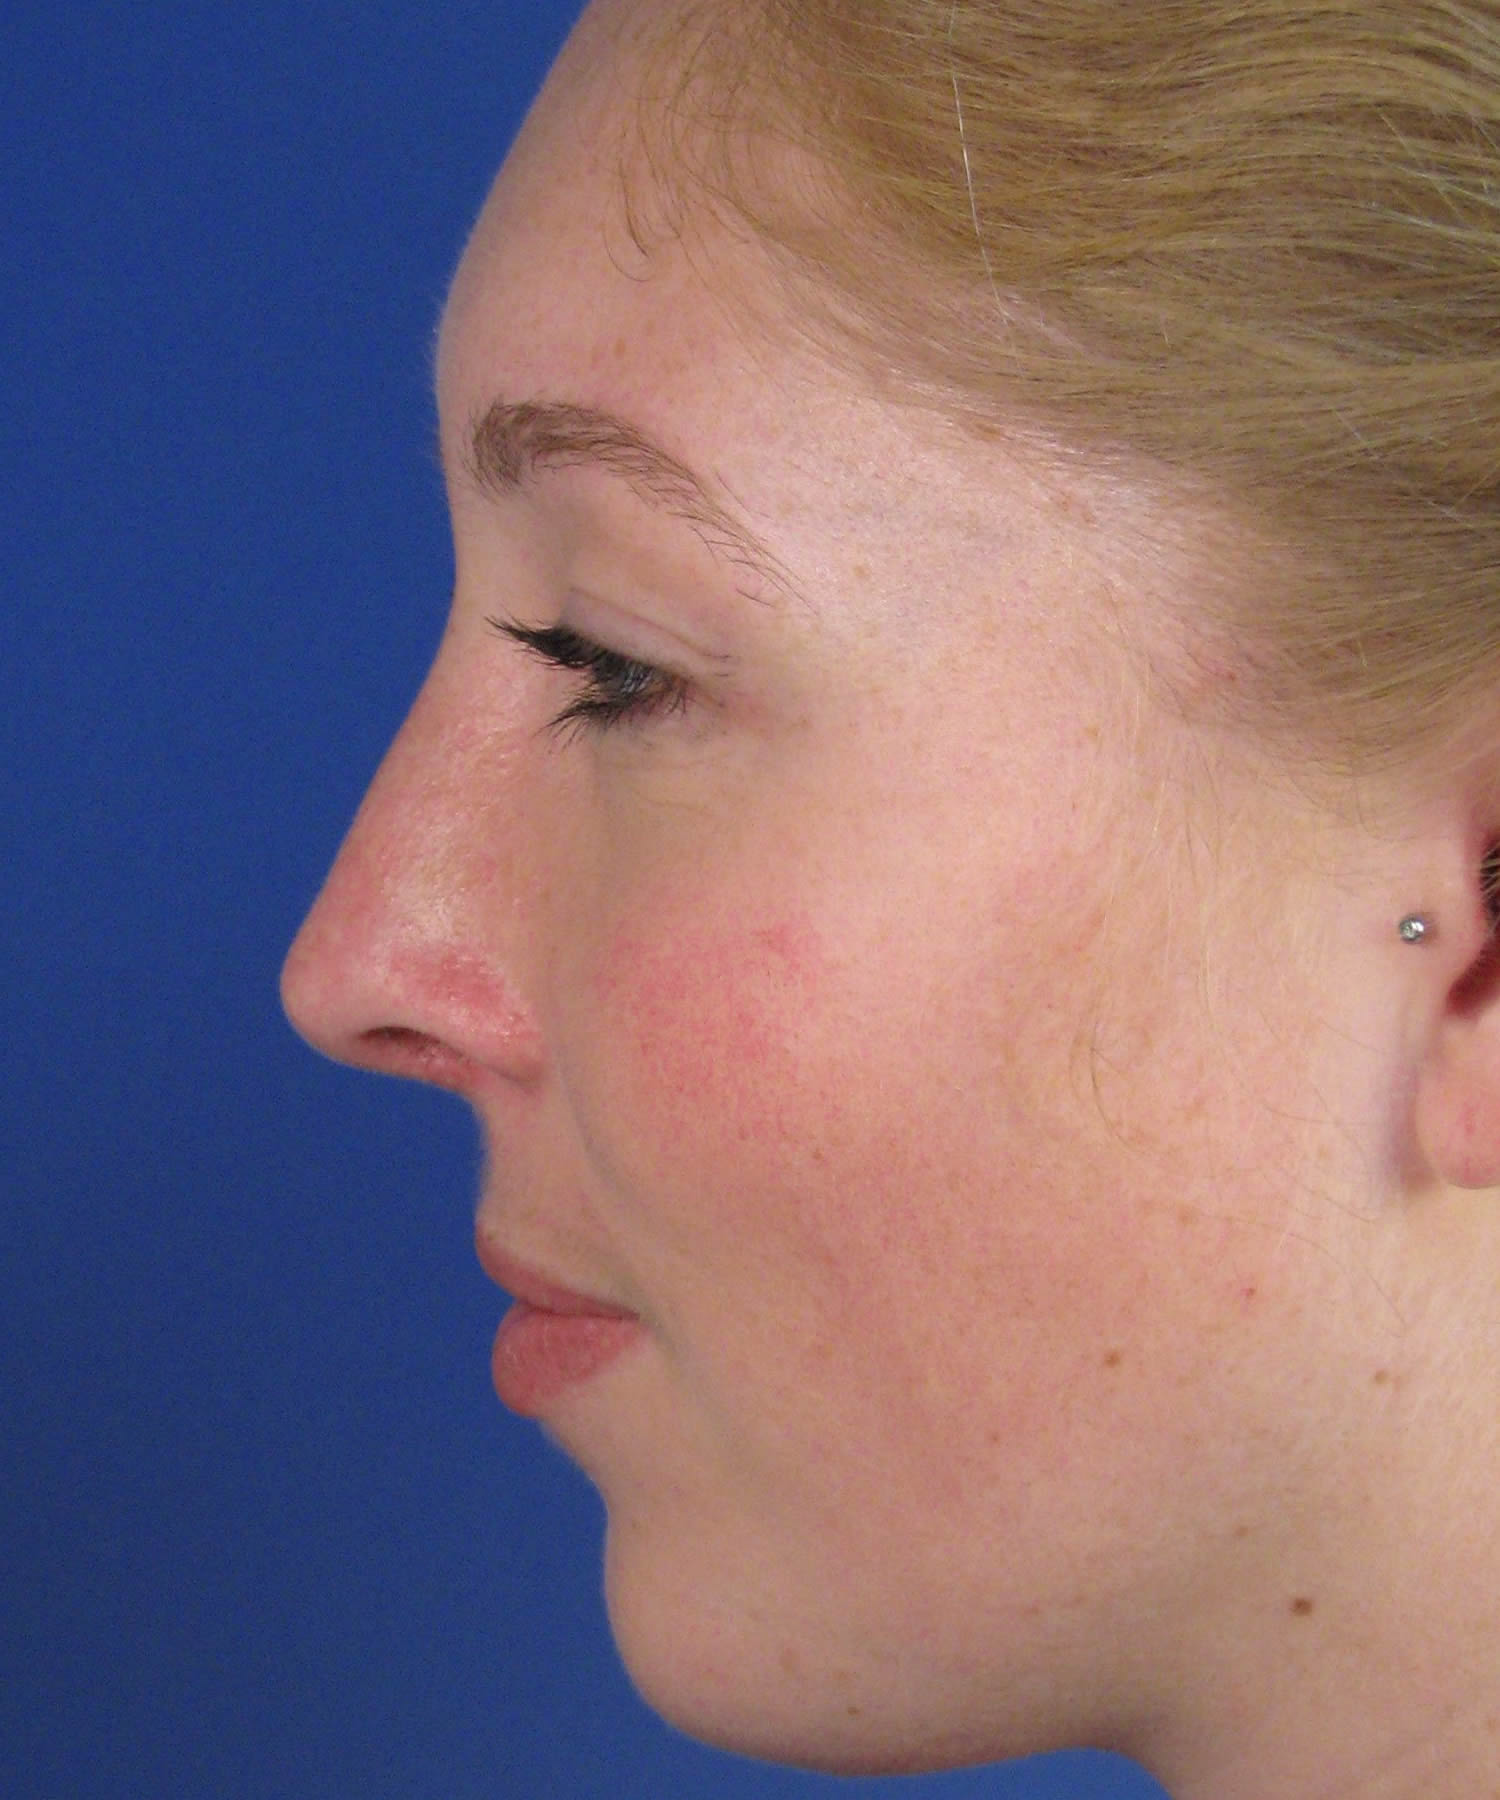
We recently published our San Diego online rhinoplasty tutorial on spreader graft use in the world of rhinoplasty and nose reshaping. Building on this particular topic in rhinoplasty and revision rhinoplasty, I decided to post this blog entry focusing on a recent San Diego nosejob patient who was in for a follow-up visit.
Rhinoplasty Patient
This particular San Diego rhinoplasty patient originally consulted with us to have her nose reshaped for cosmetic reasons. If you look at her preoperative rhinoplasty photos below you can see that much of her problem had to do with the middle one third of her nose. She has very attractive facial features and thought that her nose was slightly distracting. You can see on her frontal view of the nose that her alignment is slightly off to her right side. On the oblique view, it almost appears as if her nose curves away from you. And on her side view of the nose, she has a slight hump only.
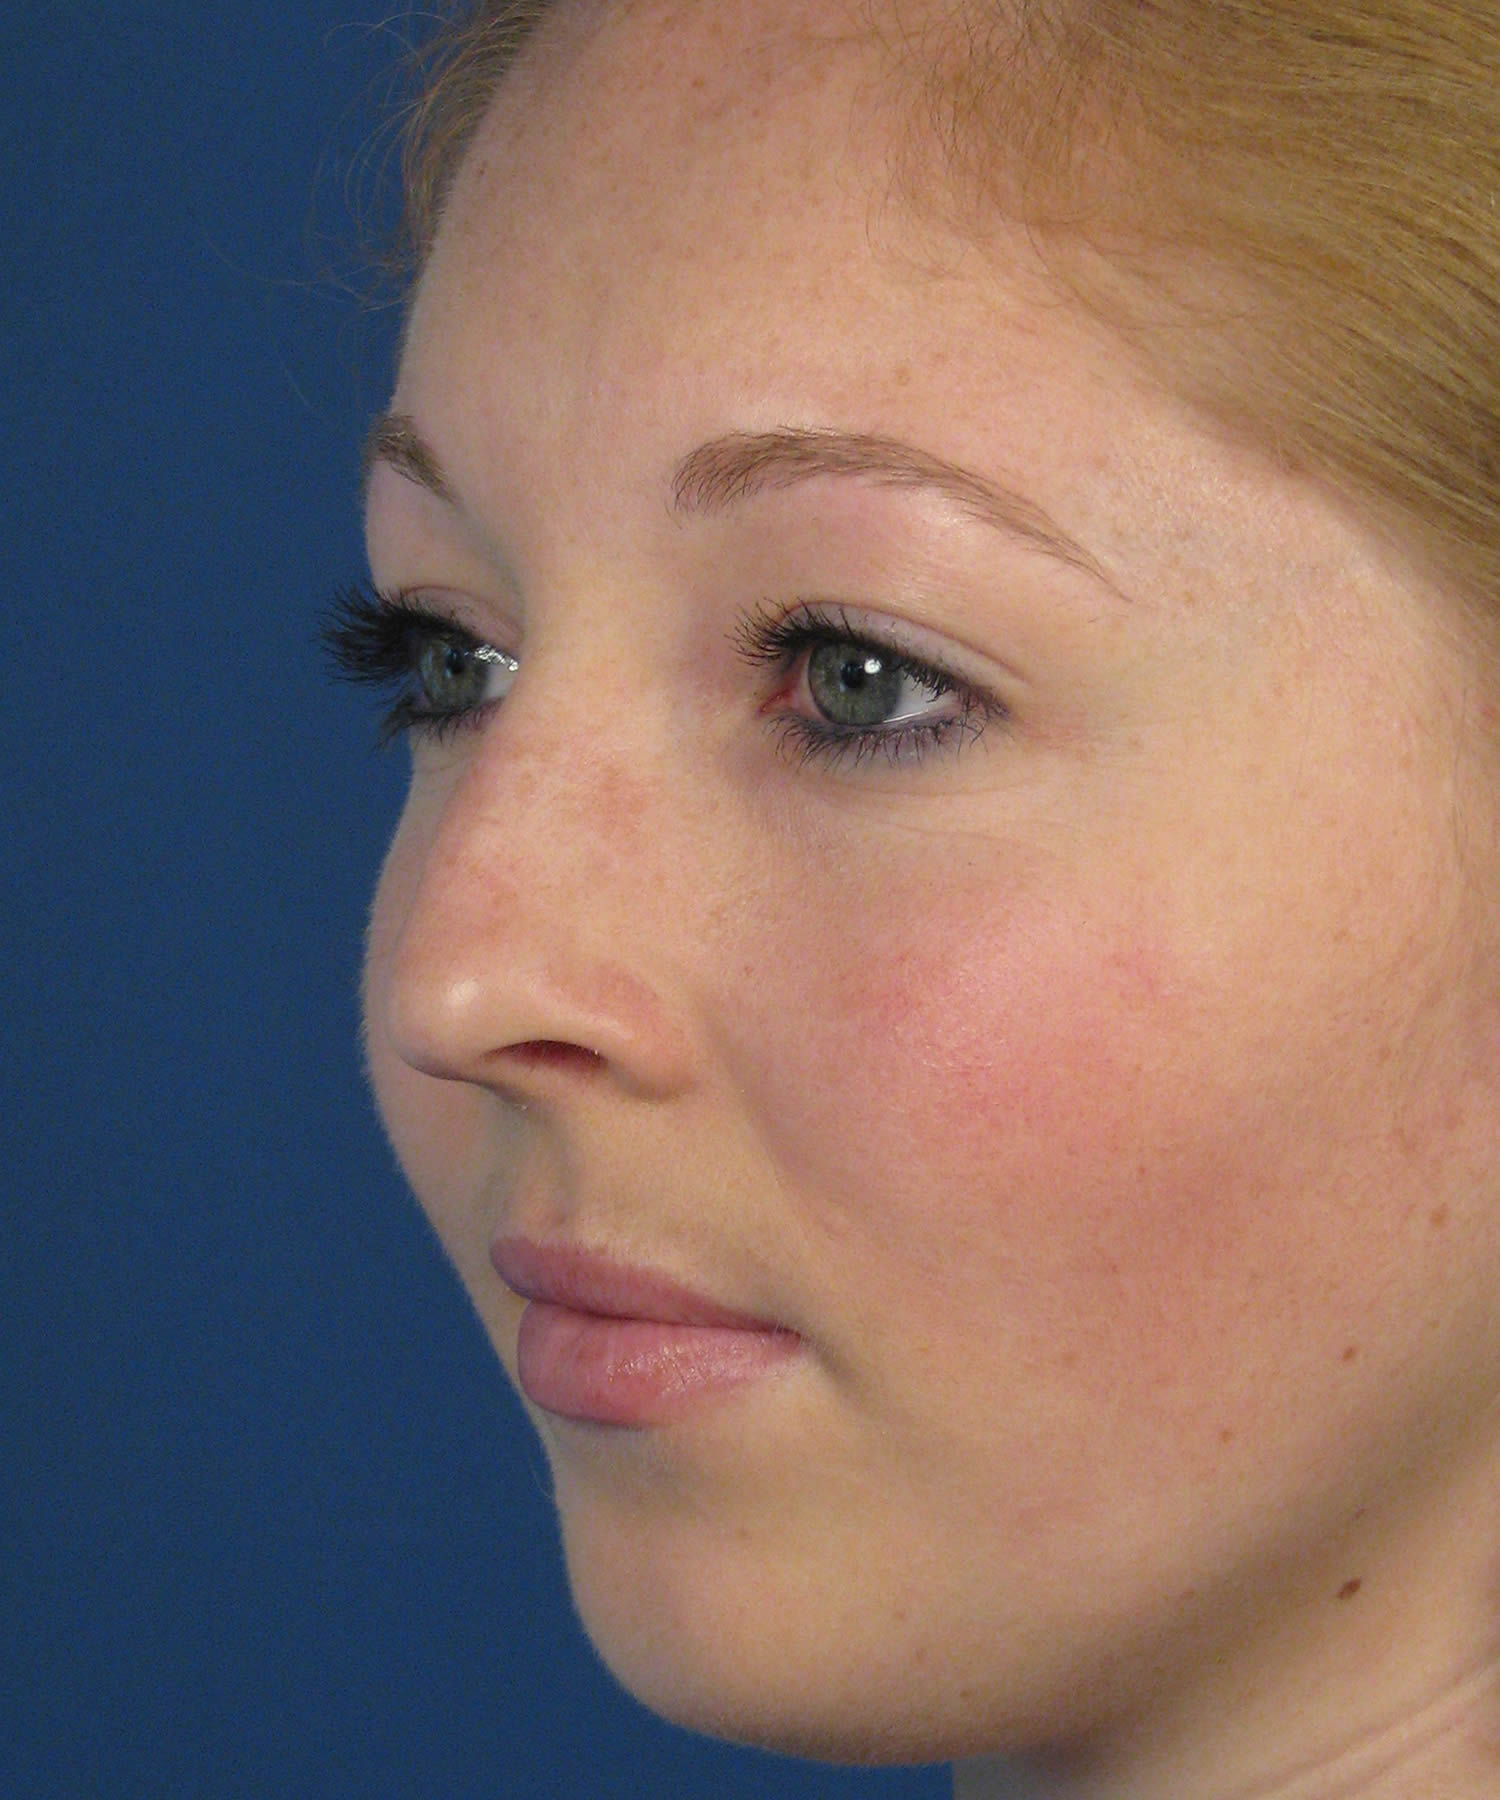
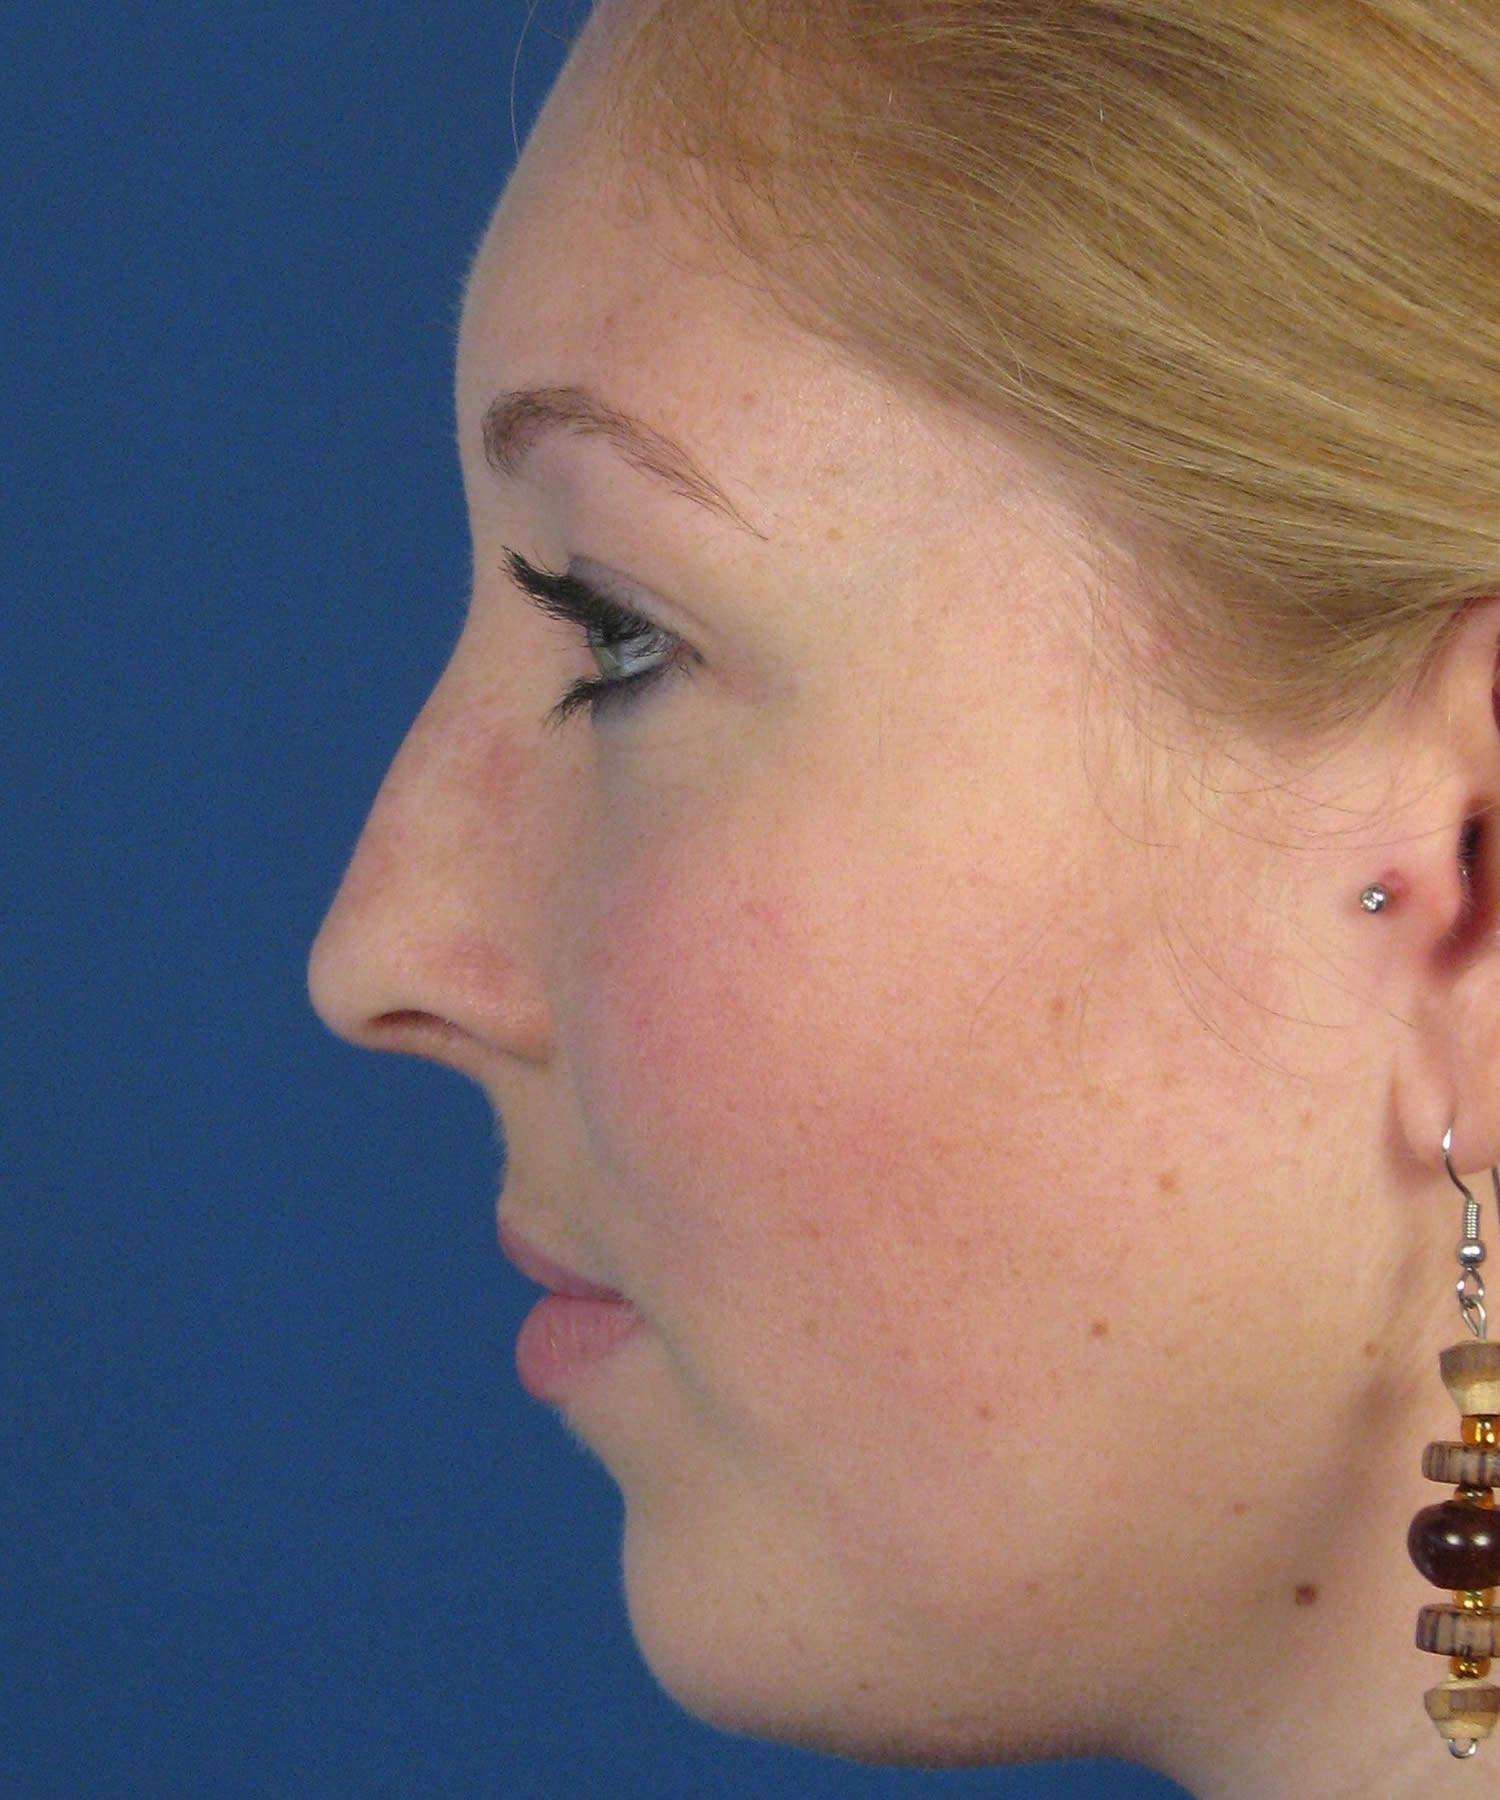
Diagramming The Nose
The following rhinoplasty diagrams are provided to help further understand her main issues with the nose. Although she had a slight bump on the bridge, the real concerns that I had involved the middle one third of the nose as mentioned. Specifically, this involved what is called the middle nasal vault, which impacts the cosmetic appearance of the nose overall but is also critically important to the function of the nose. For these two reasons, I had to carefully evaluate this small area with a very well mapped out game plan as far as her rhinoplasty procedure was concerned. This is not the type of nose that needed significant changes to the shape. This patient has an already attractive appearance. A few millimeters here and there is all that was necessary. Unfortunately, these minute changes involved the middle vault region, which is arguably the hardest area of the nose to reshape when performing rhinoplasty. Referencing the diagrams below, you can see that the middle vault was curved off to the side. On her left side (right side when looking at her photo), this created a depression with abnormal shadowing of the nose as was also appreciated on her oblique rhinoplasty view. On her right side, she had more of a prominence due to the cartilage in this region being shifted off to that side. Combined these two issues caused disruption of her brow-tip aesthetic line (please refer to our San Diego online rhinoplasty tutorial on nasal analysis to remind yourself of these often used terms).
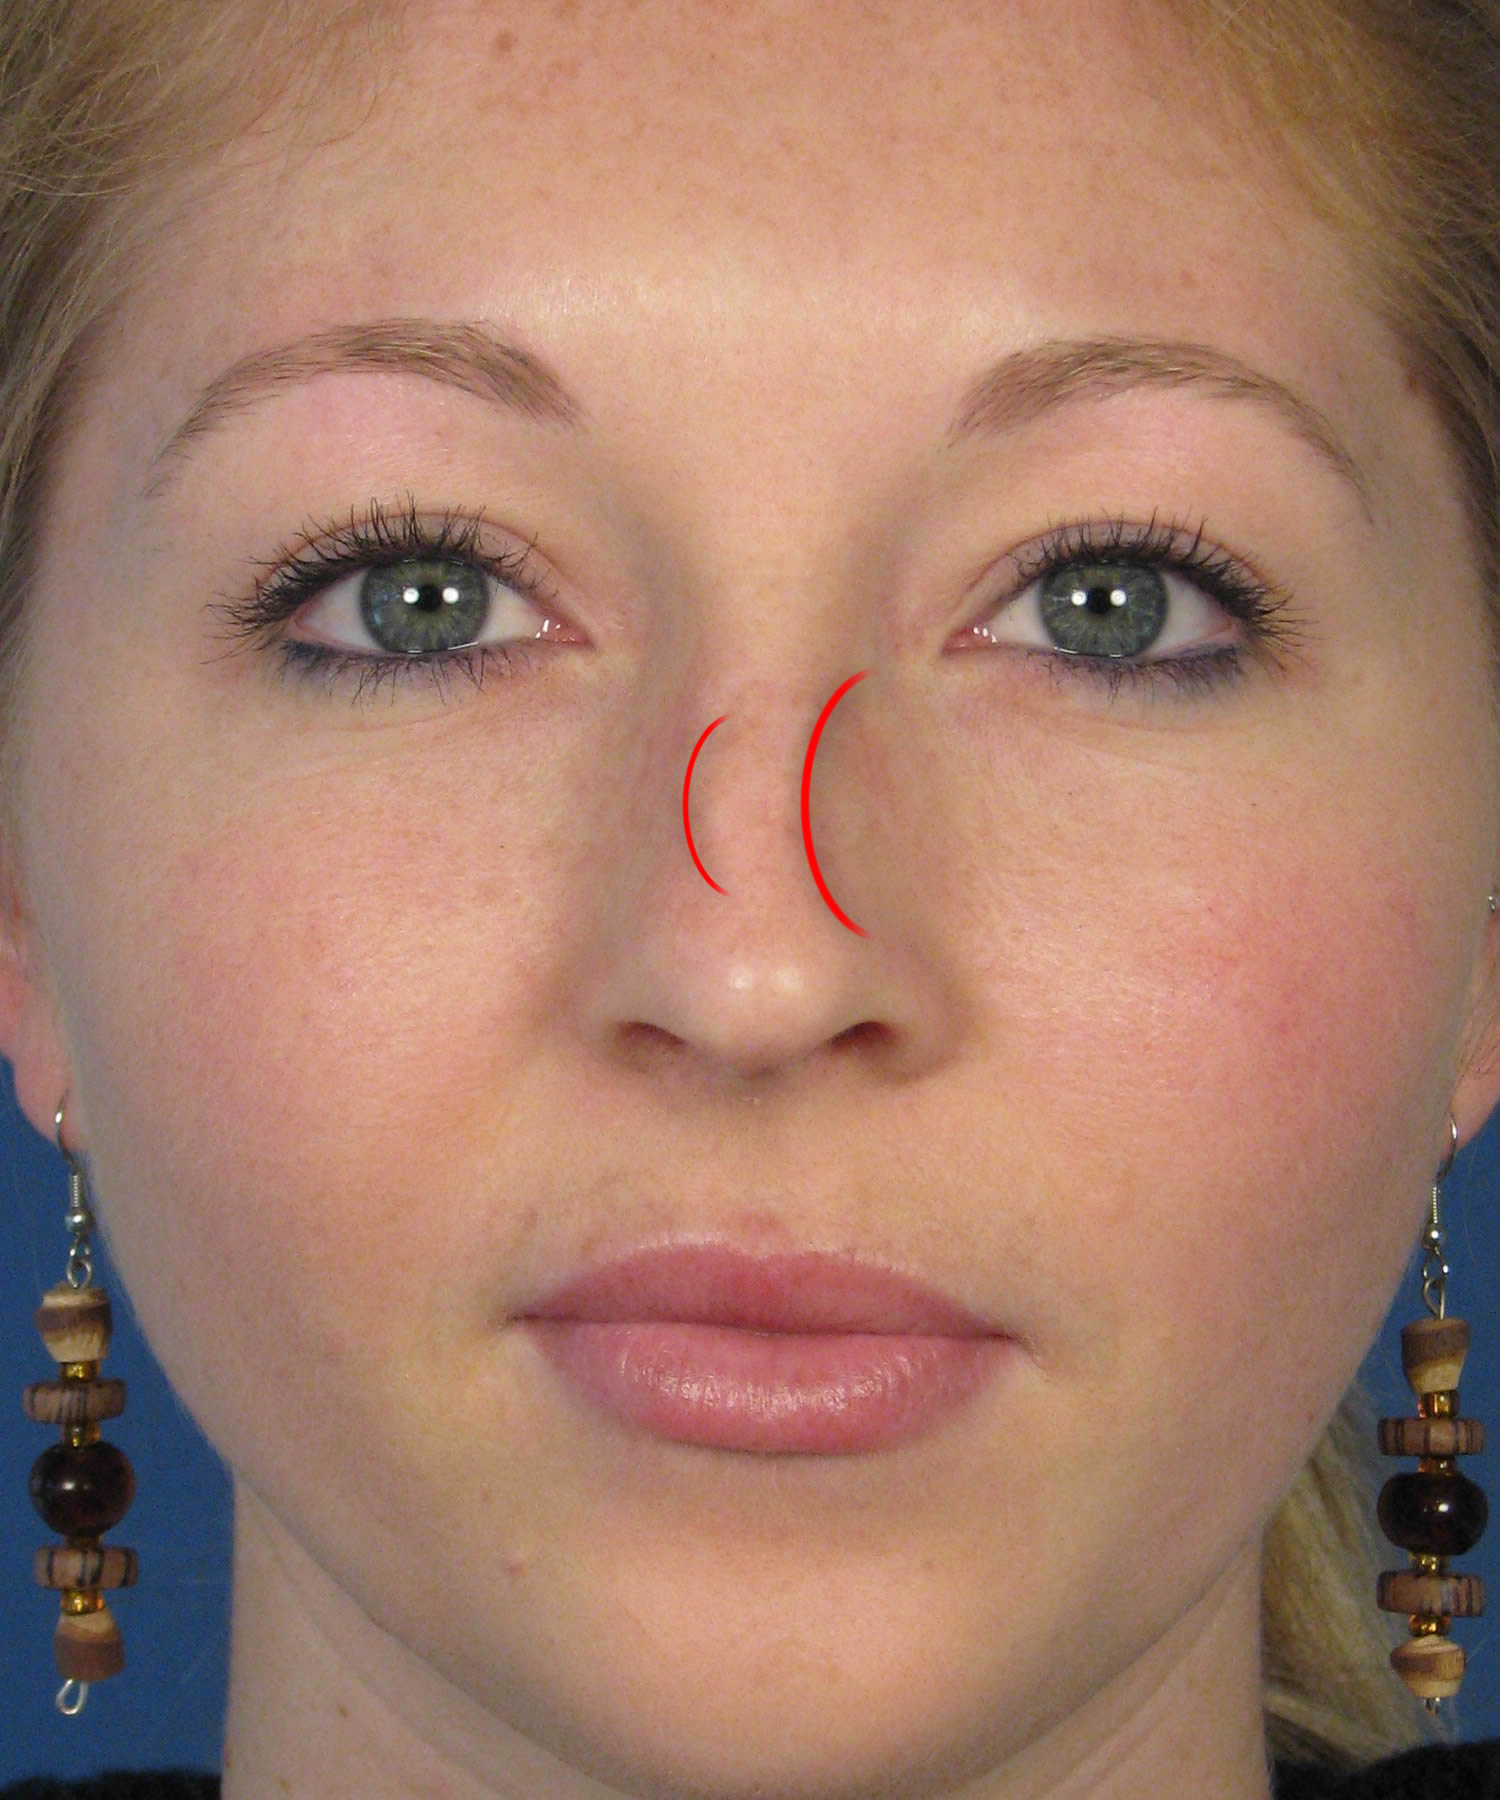
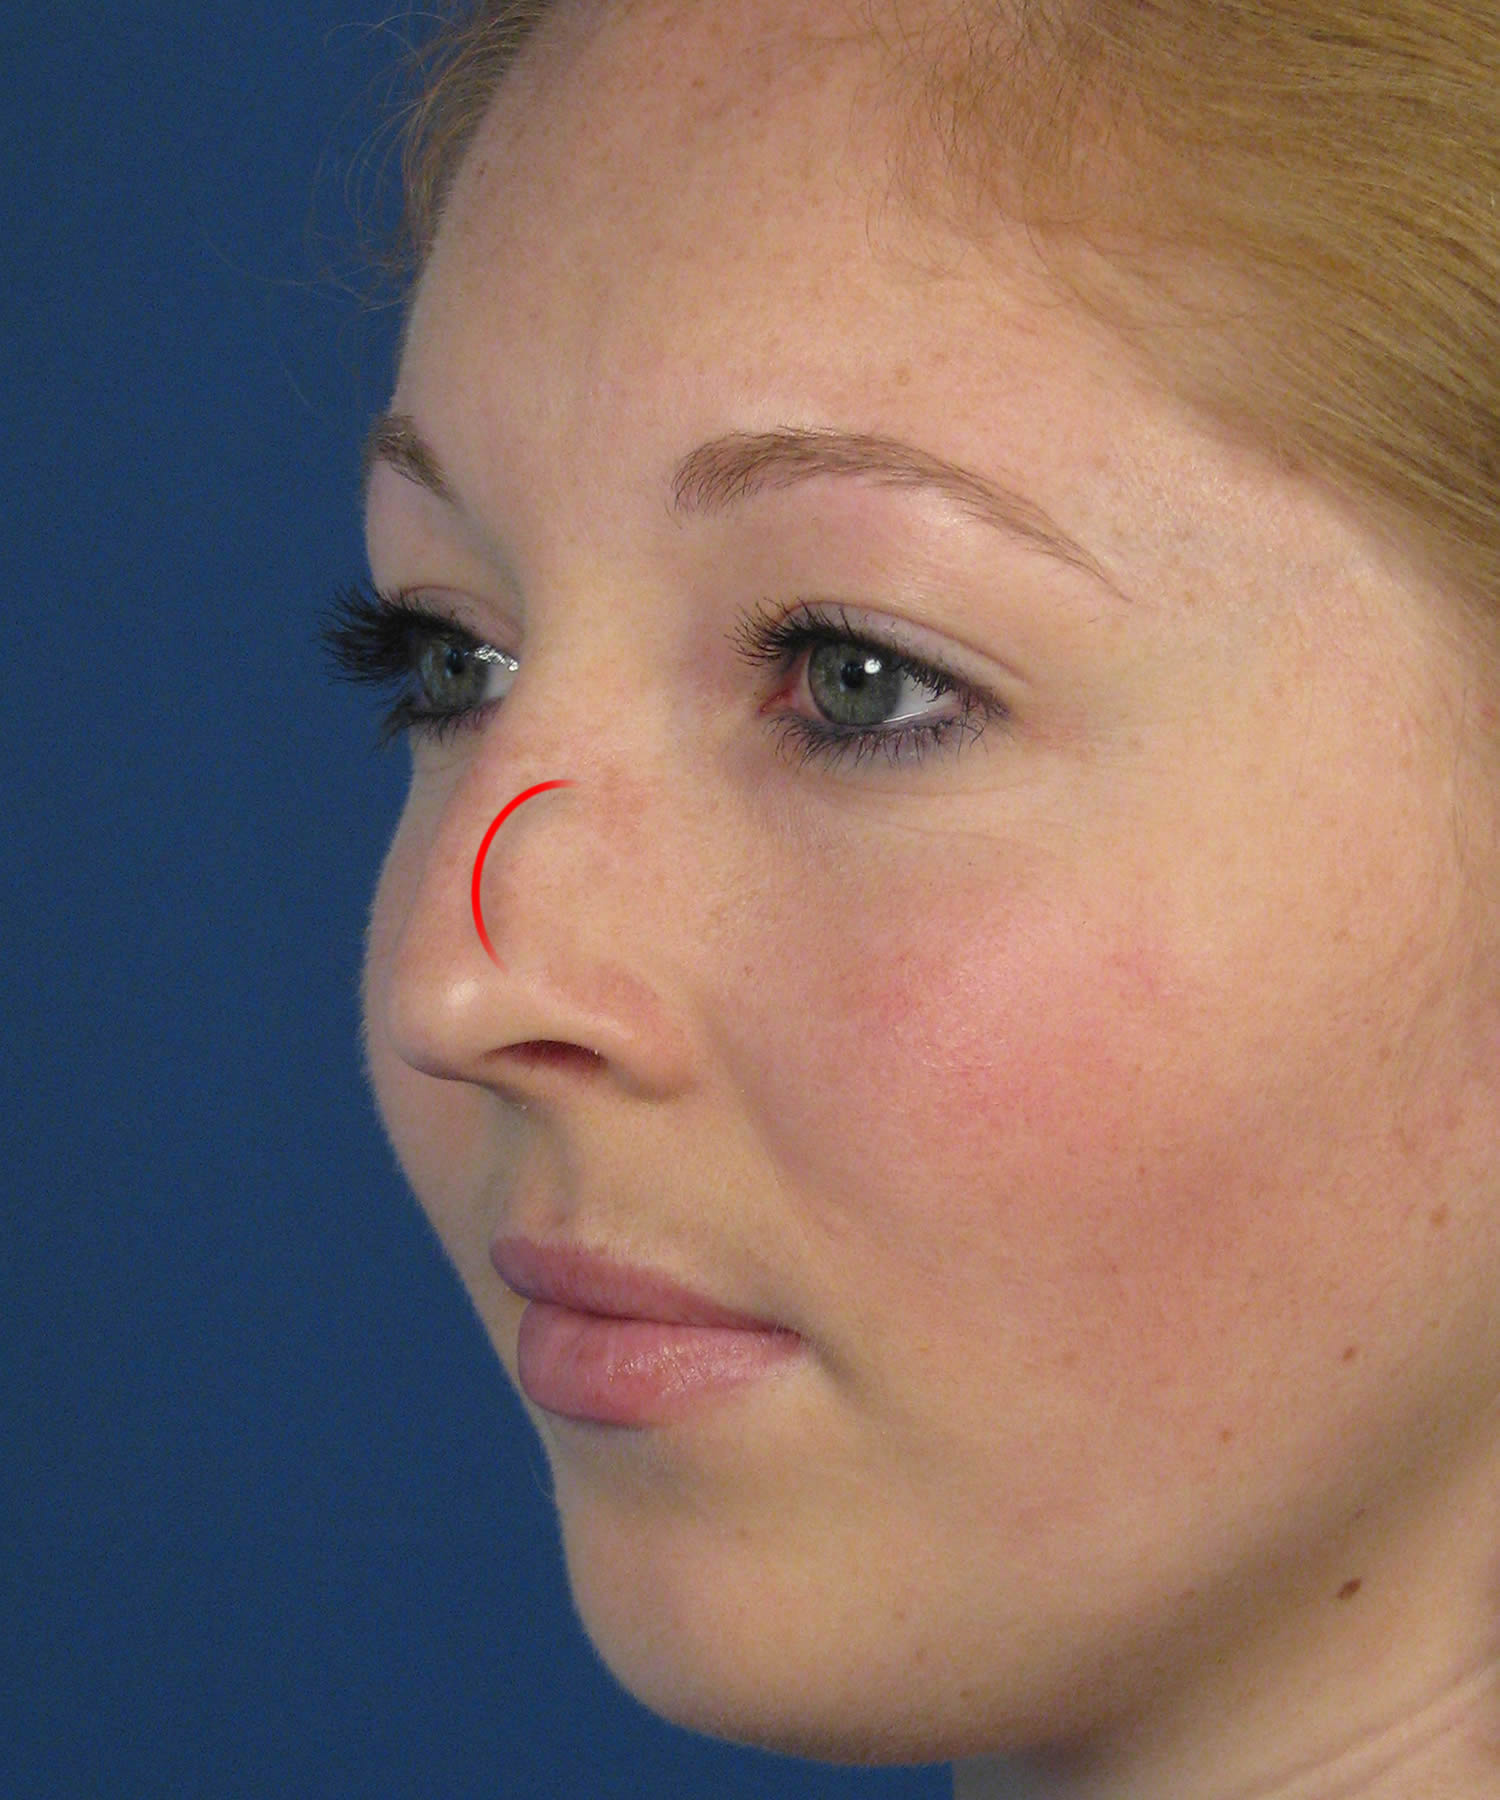
Rhinoplasty Technique and Spreader Grafts
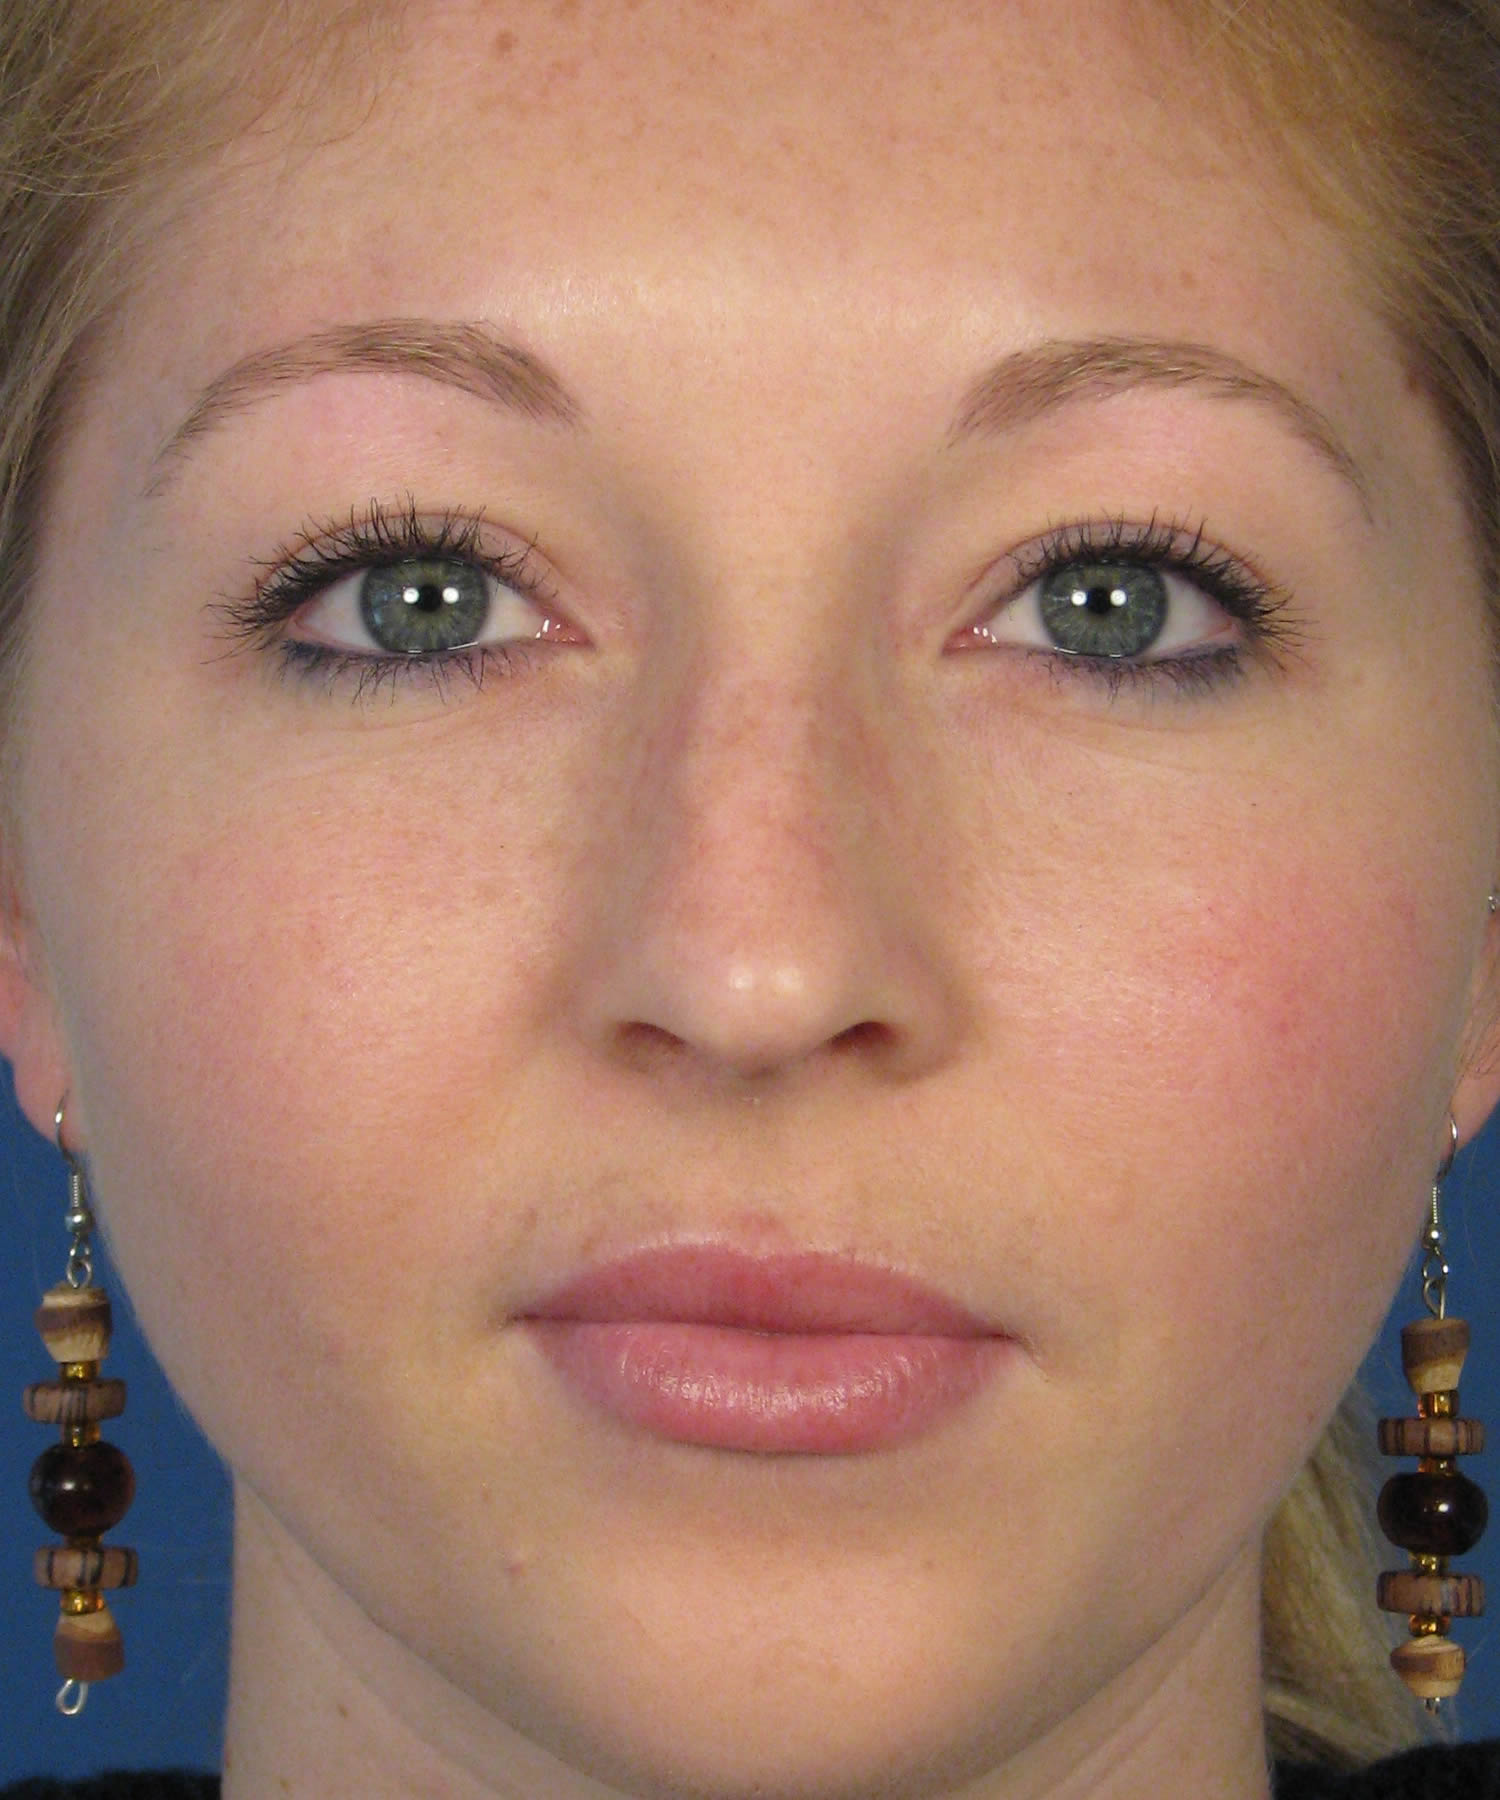
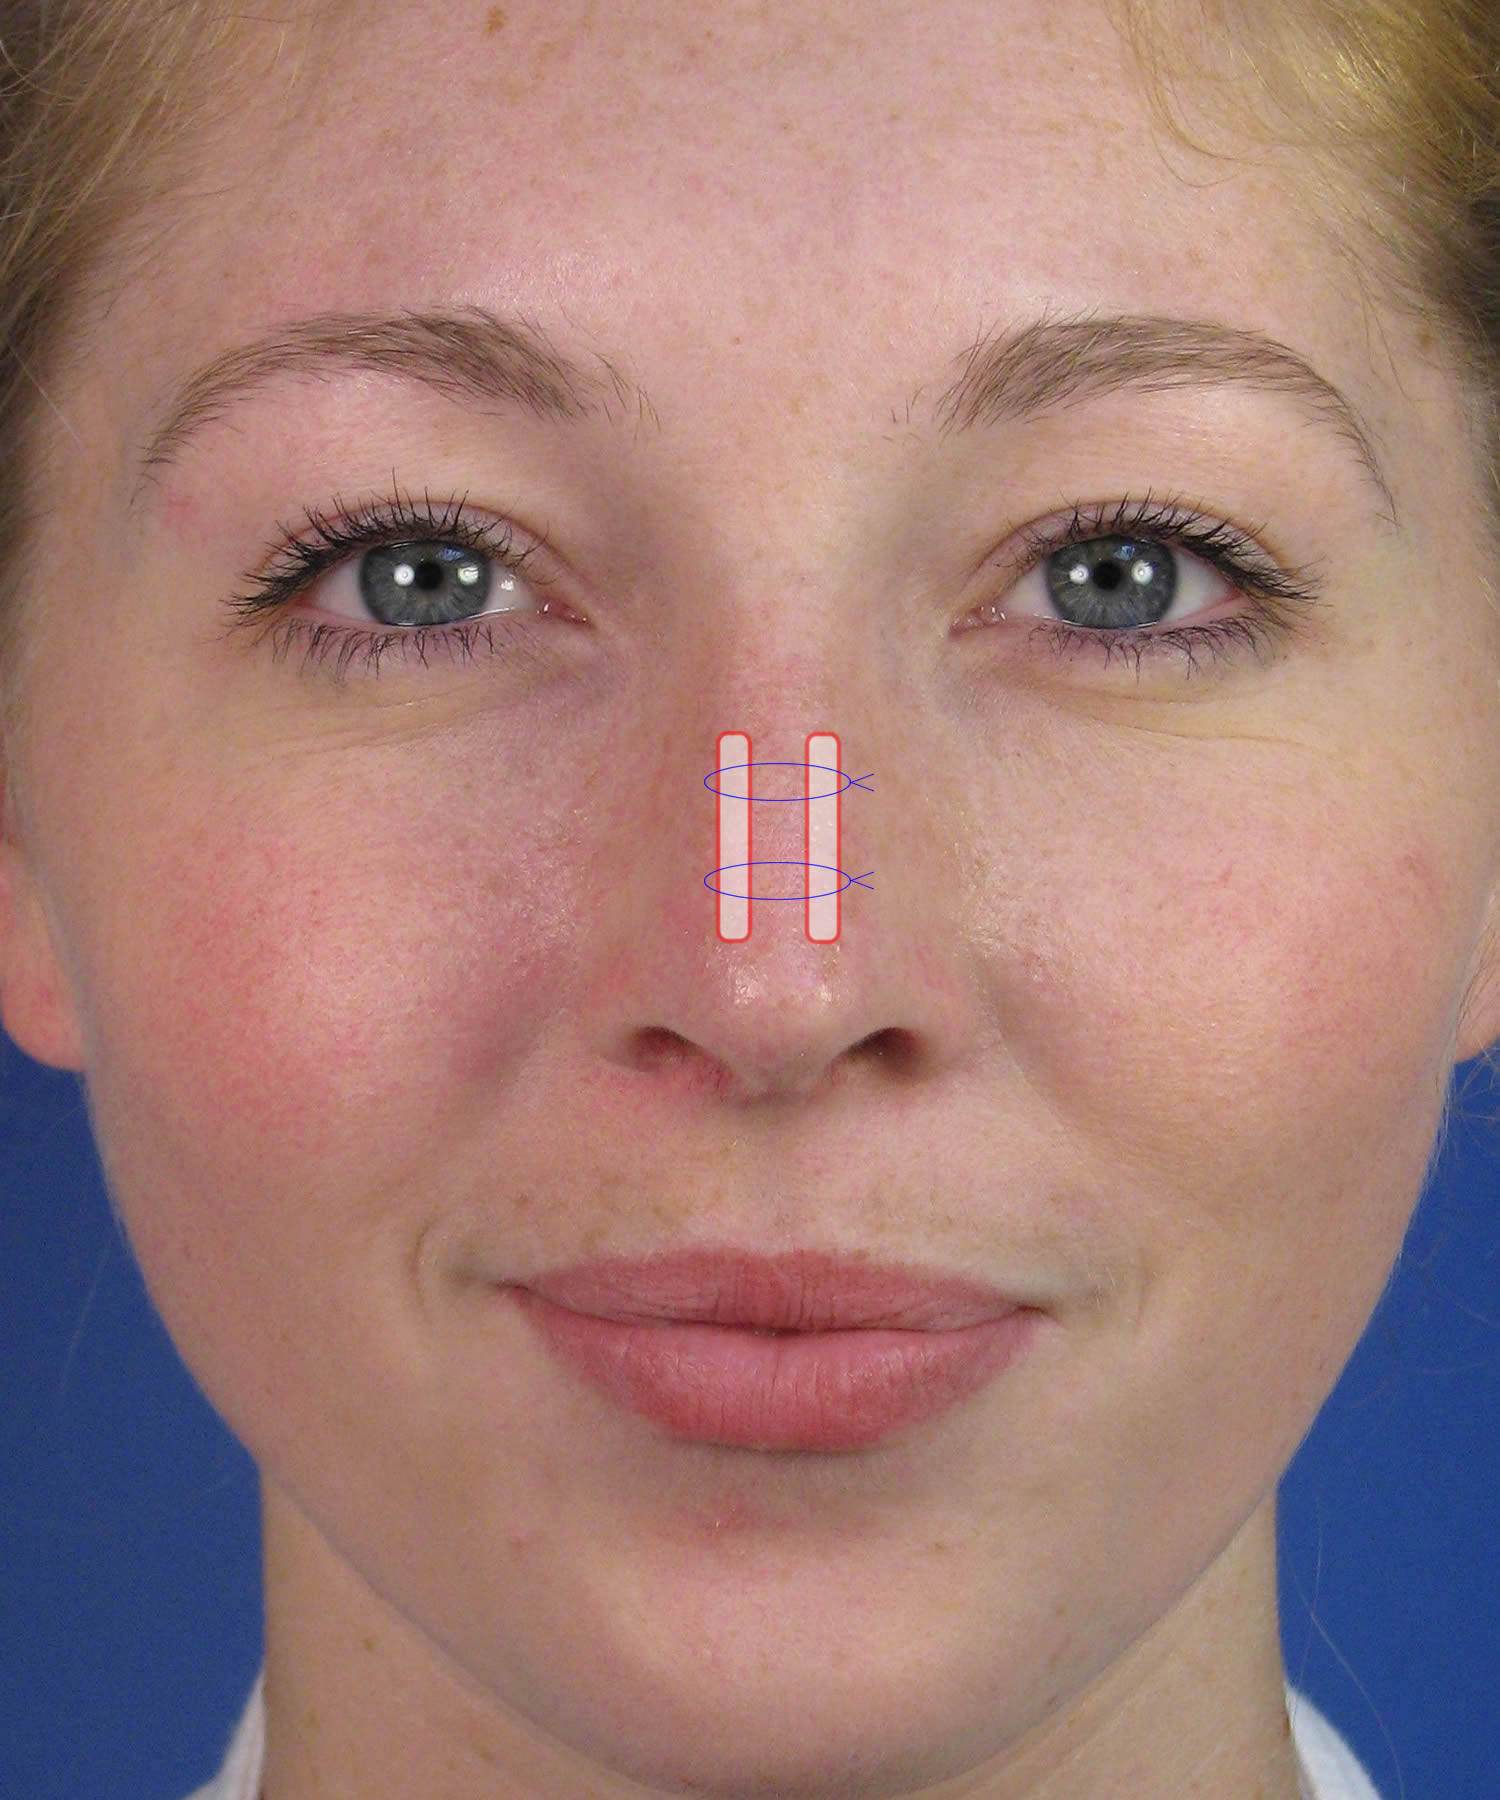 So how do you reshape this type of nose to correct the middle one-third of the bridge without disrupting the other features of her nose that seem to be just fine? In this particular case of rhinoplasty, I opted to accomplish the goals by using spreader grafts as part of the nosejob procedure. First, I reduced the slight hump and performed nasal osteotomies (breaking the nose) to help reposition the bones (upper one-third of the nose). Once this was done, I then focused in on her middle vault region, which was still quite asymmetric or crooked. In order to straighten the nose alignment in this specific area, I placed spreader grafts. These are grafts that are created from cartilage taken out of her own septum. So there is no foreign material used in this process. The spreader grafts are made of her own body’s tissue. To learn more detailed information about spreader grafting, please refer to our San Diego online rhinoplasty tutorial on spreader grafts in rhinoplasty. The spreader grafts are carefully placed between the upper lateral cartilage and the ridge of nasal septum that runs in the middle of the bridge. As you can see in the adjacent diagram, these grafts are placed on both sides, although they do not necessarily have to be equal in size or length. The spreader grafts are sewn into the nose (blue threads) and anchored to the surrounding cartilage. The placement of the spreader grafts is quite deep inside of the nose, therefore, they are sometimes referred to as hidden graft since they are sandwiched between other parts of the nose. The spreader graft helps to ‘splint’ the middle vault of the nose and creates the desired symmetry. Without them, it would have been quite difficult to reshape the nose in this particular rhinoplasty patient and achieve the desired outcome of an improved brow-tip esthetic line. Below you can see her complete before and after rhinoplasty photo series. As you can see, she has a nice, finesse improvement in her nasal appearance following cosmetic reshaping of the nose. She still looks like the patient that walked in the office that first day – just a more refined, symmetric version of that young lady.
San Diego Before and After Rhinoplasty
Posted on behalf of
11199 Sorrento Valley Road Suite 202
San Diego, CA 92121
Phone: Call Us 619-296-3223
Email: consultant@drhilinski.com

